Activating a License on a Device: How Hardware IDs Work
The previous post in this series covered creating a product and generating a license key. This one covers the other half: what happens when a real customer's application takes that key and calls activate() for the first time.
Validate vs. Activate — Not the Same Call
These two are easy to mix up, and they do genuinely different things:
- Validate — checks the key is real and still active. Doesn't touch the activation count. Safe to call on every app launch.
- Activate — does everything Validate does, plus permanently ties the key to a device and increments
CurrentActivations. Call this once, the first time a customer installs your app.
What "Device" Actually Means
For a node-locked license, the SDK needs a stable identifier for the machine it's running on — something that survives reboots and app updates, but isn't trivial to spoof. There's no universal API for this across operating systems, so each platform needs its own approach:
private static string GetHardwareId()
{
    // Windows: motherboard serial + CPU ID, hashed together
    if (OperatingSystem.IsWindows())
    {
        var board = GetWmiValue("Win32_BaseBoard", "SerialNumber");
        var cpu   = GetWmiValue("Win32_Processor", "ProcessorId");
        return Sha256Hex(board + cpu);
    }

    // macOS: IOPlatformUUID
    if (OperatingSystem.IsMacOS())
        return ReadMacOsPlatformUuid();

    // Linux: /etc/machine-id
    return File.ReadAllText("/etc/machine-id").Trim();
}
All 6 official SDKs (.NET, Node.js, Python, Java, PHP, C++) include a working implementation of this — you don't have to write it yourself unless you're integrating over raw REST.
Calling Activate
var result = await client.ActivateAsync(new ActivateRequest
{
    LicenseKey = enteredKey,
    Version    = "1.0",
    DeviceId   = GetHardwareId(),
    DeviceName = Environment.MachineName
});

if (!result.IsValid)
{
    // result.ErrorCode is one of: NotFound, SeatsExhausted, Expired, Revoked, VersionMismatch
    ShowActivationError(result.ErrorCode);
    return;
}

SaveLicenseLocally(result);
What You See on the Admin Side
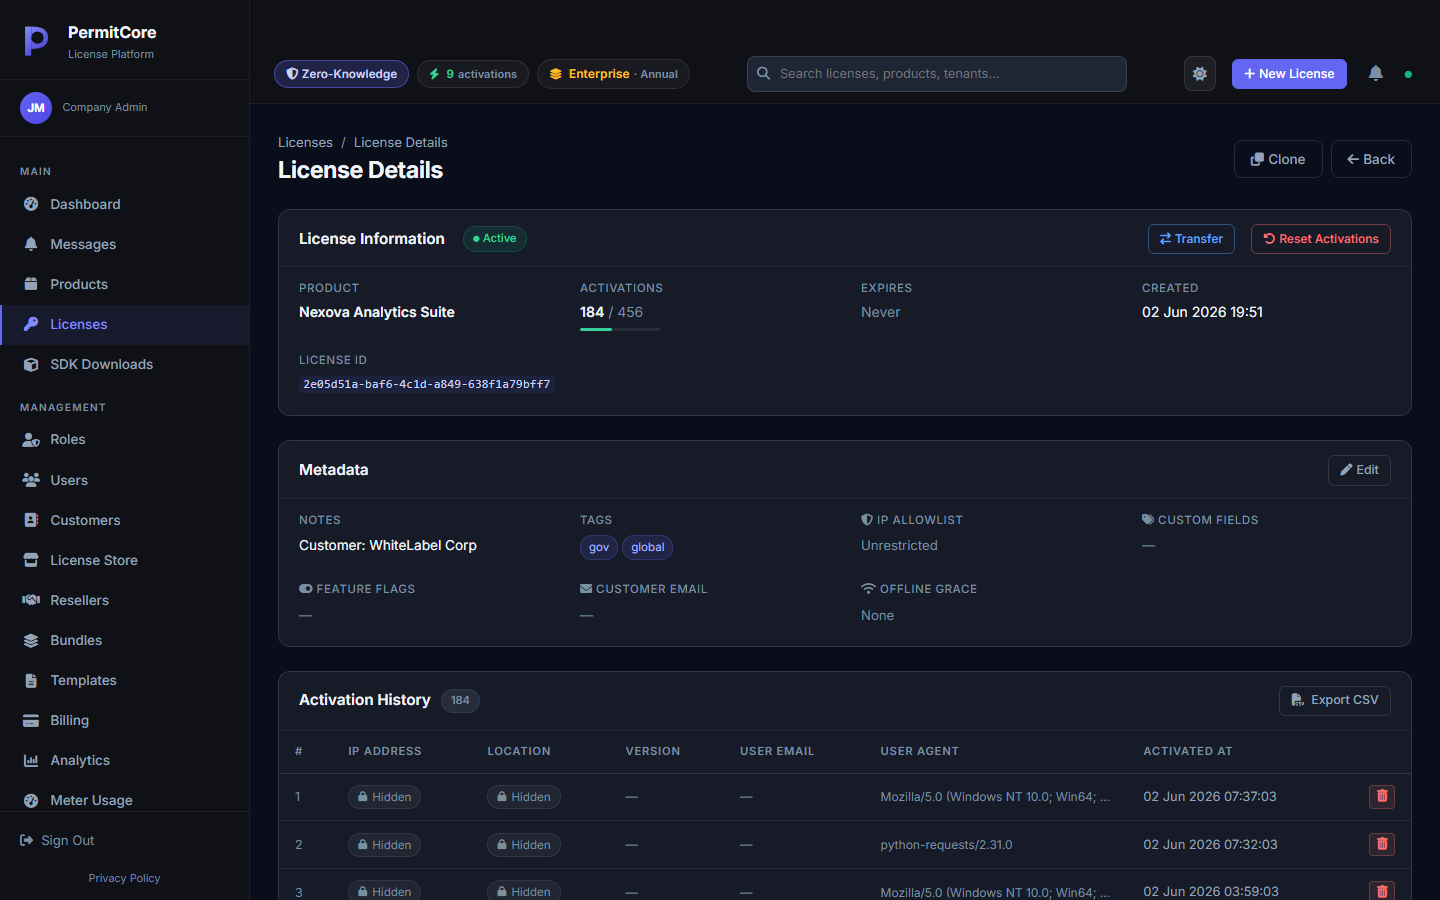
Every successful activation shows up immediately on the license's detail page — the exact request's user agent and timestamp, and (when available) a rough geographic location resolved from the request IP. This is the same data your support team would look at if a customer says "it says I'm out of activations but I only installed it once":
IP address and location are shown to you as the tenant owner in the real product — blurred here only because this account's data is a public demo.
Reactivating the Same Device
Customers reinstall software constantly — OS reinstalls, a new hard drive, a factory reset. PermitCore recognizes when an activation request comes from a hardware ID that's already recorded against that license and treats it as a reactivation, not a new seat: it doesn't consume another slot out of MaxActivations, even if the license is already fully seated.
Deactivating a Device
When a customer replaces a machine, you (or they, via the self-service Customer Portal) can remove one specific device from a license, freeing that seat for a new activation — without touching the other devices already on the same key.
What's Next
Activation assumes your app can reach api.permitcore.dev. The next post covers what happens when it can't — offline grace periods, and how PermitCore prevents a customer from just editing a local file to stay "licensed" forever.