Getting Started: Create Your First Product and License Key
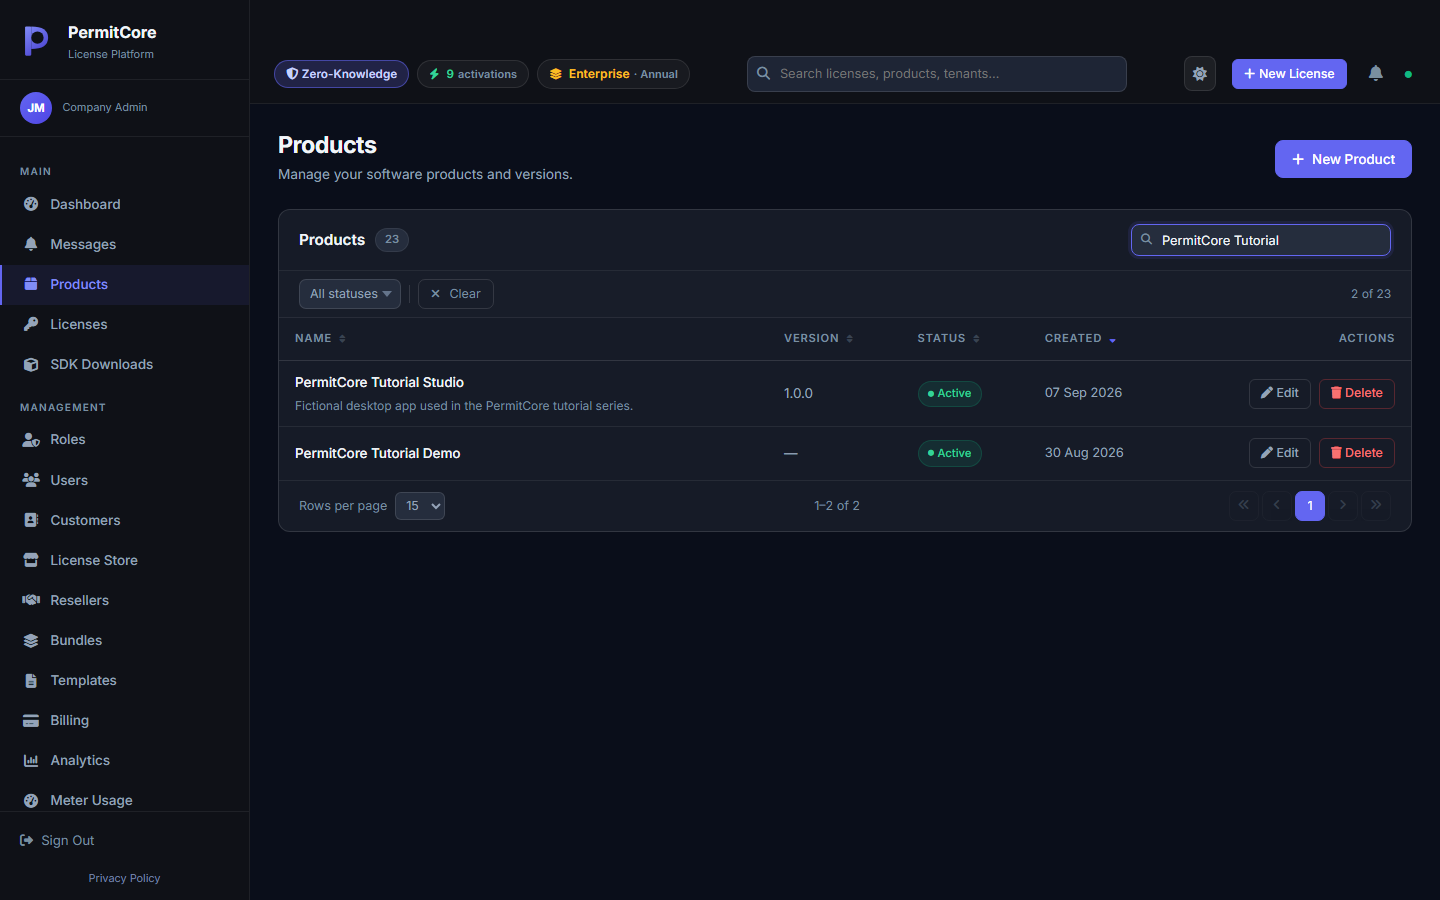
If you've never used PermitCore before, this is the walkthrough to start with. We'll go from an empty account to a real, working license key in about five minutes — no code yet, just the admin panel. Later posts in this series cover activating that key from an actual application.
Every screenshot below is from a real PermitCore account, not a mockup.
Step 1: Create a Product
A product is the container everything else hangs off — your license keys, your pricing, your customers. Think of it as the name of the software you're actually licensing. Go to Products in the sidebar and click New Product.
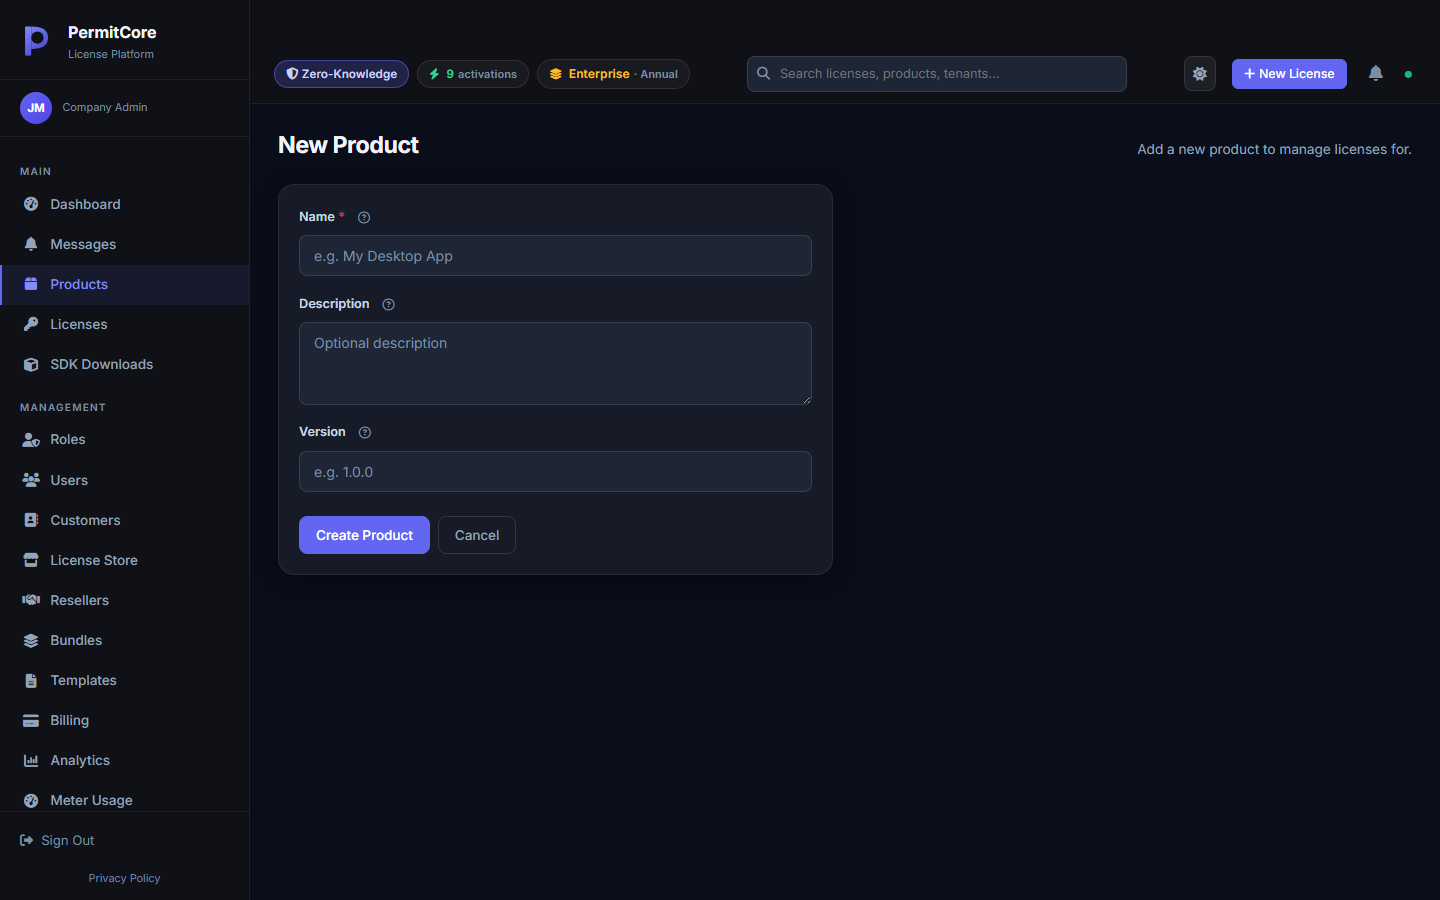
Only the name is required. Description and version are optional and purely informational.
You can create as many products as you need — most teams have one product per application they ship, sometimes split further by edition (e.g. "Studio" vs "Studio Pro").
Step 2: Generate a License Key
Once you have a product, go to Licenses and click Create License. This is the form that actually issues a real, usable key.
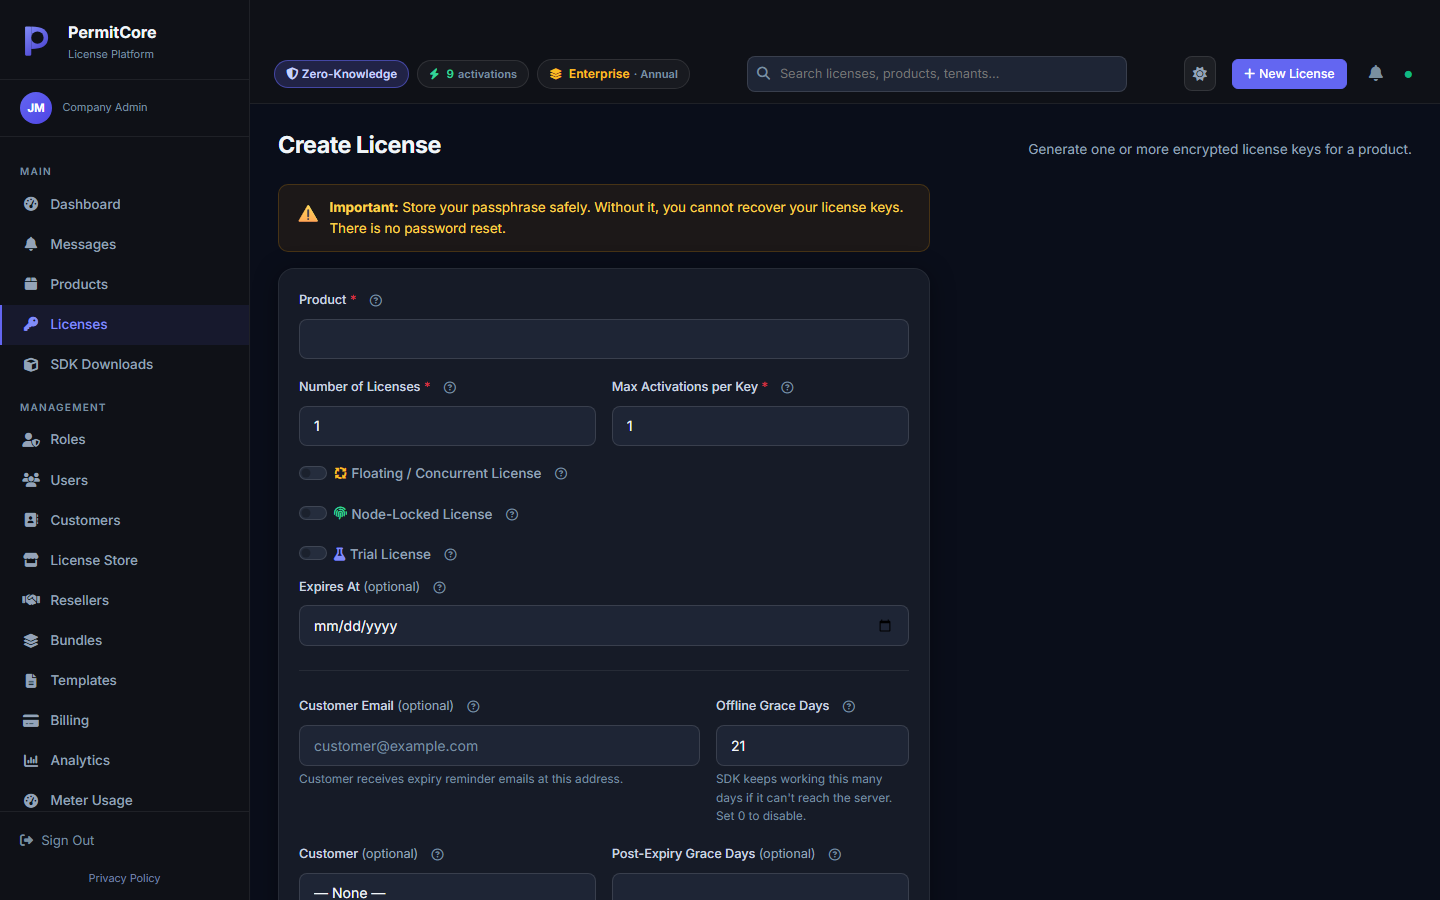
Number of Licenses lets you generate a batch at once. Max Activations per Key controls how many devices/seats one key can be used on.
A few fields worth understanding before you click Generate:
- Max Activations per Key — how many devices (or concurrent seats, if Floating is on) a single key can be active on at once.
- Floating / Concurrent License — seats are checked out and released, rather than permanently tied to one device. Covered in a dedicated post later in this series.
- Node-Locked License — the key binds to a specific device fingerprint the first time it's activated.
- Expires At — leave empty for a perpetual license, or set a date for a subscription/trial.
- Offline Grace Days — how many days the SDK keeps accepting a cached "valid" result if it can't reach the API. Also covered in its own post.
Click Generate. PermitCore encrypts the key client-side before it's ever sent to the server — see the callout below if you want the full explanation of why that matters.
Step 3: Find It in Your License List
Your new key now shows up under Licenses, grouped by product, with its activation count (currently 0 of however many you set), expiry, and status.
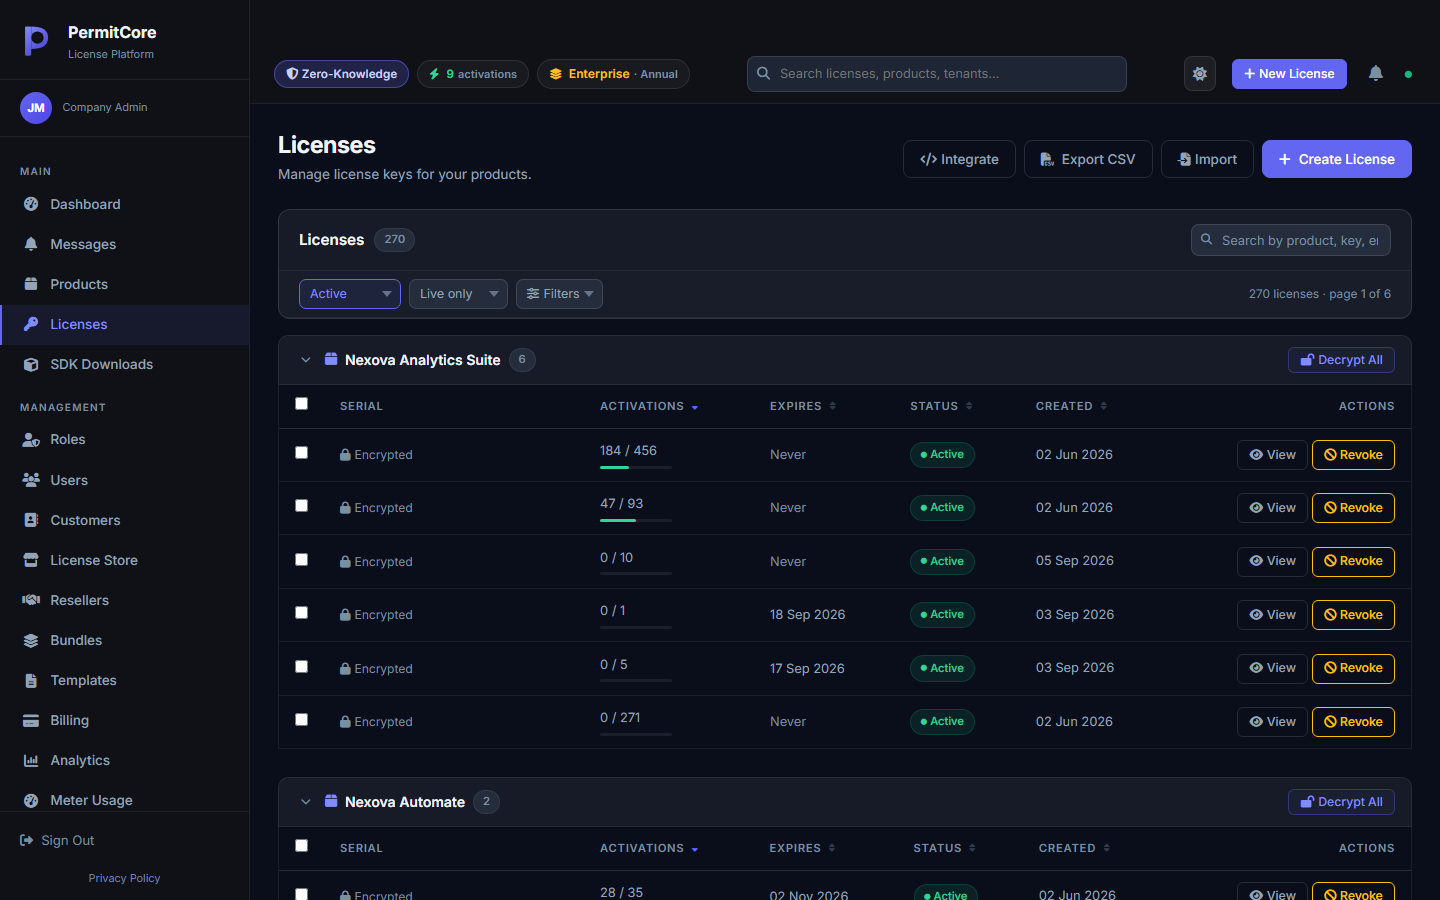
Serials are shown as "Encrypted" in the list — you decrypt one at a time (or in bulk) only when you actually need to hand it to a customer.
Click View on any license to see its full detail page — activation history, metadata, tags, and per-license settings like IP allowlisting or custom fields.
What's Next
You now have a real license key sitting in your account. The next post in this series covers what happens when a customer's application actually activates that key — including hardware fingerprinting and what PermitCore stores about each device. If you'd rather jump straight to code, the documentation's Getting Started section has copy-paste SDK examples for six languages.